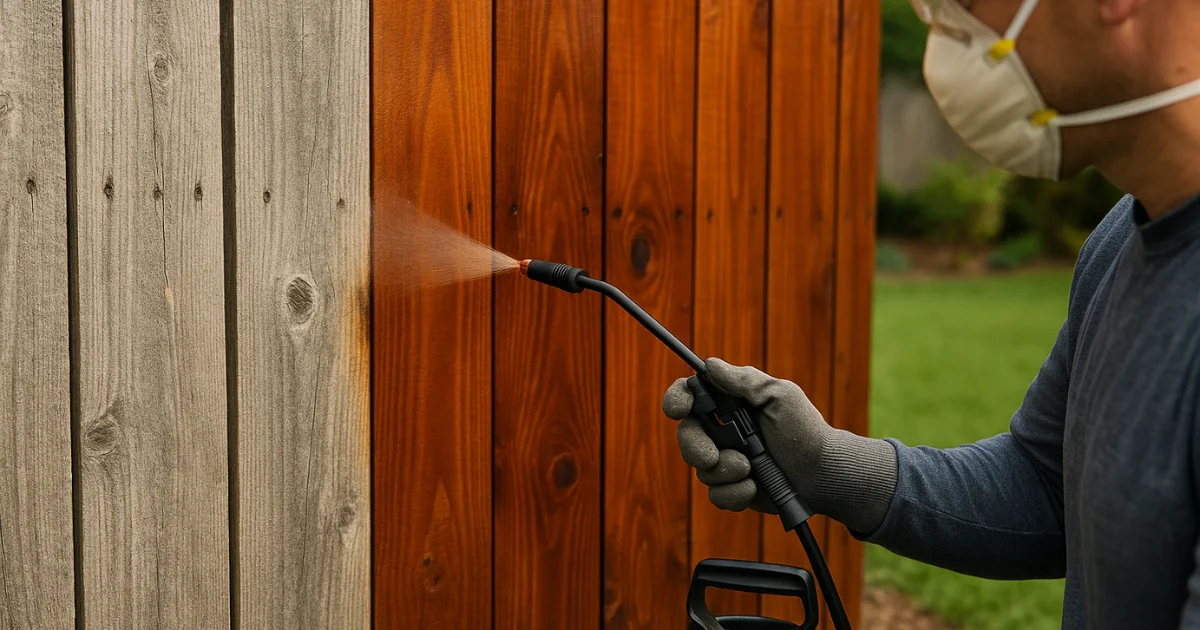
Fence staining is one of those projects that looks simple on the surface but can quickly become frustrating without the right knowledge, tools, and products. While there are plenty of DIY guides online, many miss the real challenges homeowners face. This guide is written from the perspective of professionals who have stained over 500 fences, sharing insights that will help you avoid common mistakes and achieve professional-looking results on your own.
Choosing the Right Stain for DIY Fence Staining
The first decision every DIYer faces is whether to use oil-based or water-based stain for your fence staining project.
- Water-Based Stains for DIY Projects: Big-box stores like Home Depot, Lowe’s, and Sherwin Williams sell popular brands such as Behr, Cabot, and Sherwin Williams stains. While advertised to last 6–8 years, in reality, water-based stains last 3–5 years at best. Applying them correctly requires professional equipment. If brushed or rolled, you’ll still need to back-brush to avoid drips. Many homeowners call professionals later to remove poorly applied water-based stains due to uneven finishes or disappointing colors.
Tip: Before committing, buy a quart or gallon and test it on a spare picket from Home Depot. If you like the result, consider hiring a professional to apply it with the right equipment.
- Oil-Based Stains: The Better DIY Choice
A much better choice for DIYers. Oil-based penetrating stains are self-leveling, forgiving, and give a beautiful finish without requiring commercial sprayers. Some top options include:- Expert Stain & Seal – Contractor-grade but available online to homeowners. Ships in about 2 days.
- Wood Defender – Contractor-only product (ask a local staining pro to supply it or contact our fence staining experts for product recommendations).
- Ready Seal – The best retail option, widely available at Home Depot and Lowe’s.
- TWP (Total Wood Preservative) – High-quality but only available online.
Pro Tip: Always check real-world photos on Facebook or contractor pages before picking a color. Brochures rarely match how the stain looks on actual cedar or pressure-treated wood.
Equipment for DIY Fence Staining

The tools you choose will make or break your fence staining project.
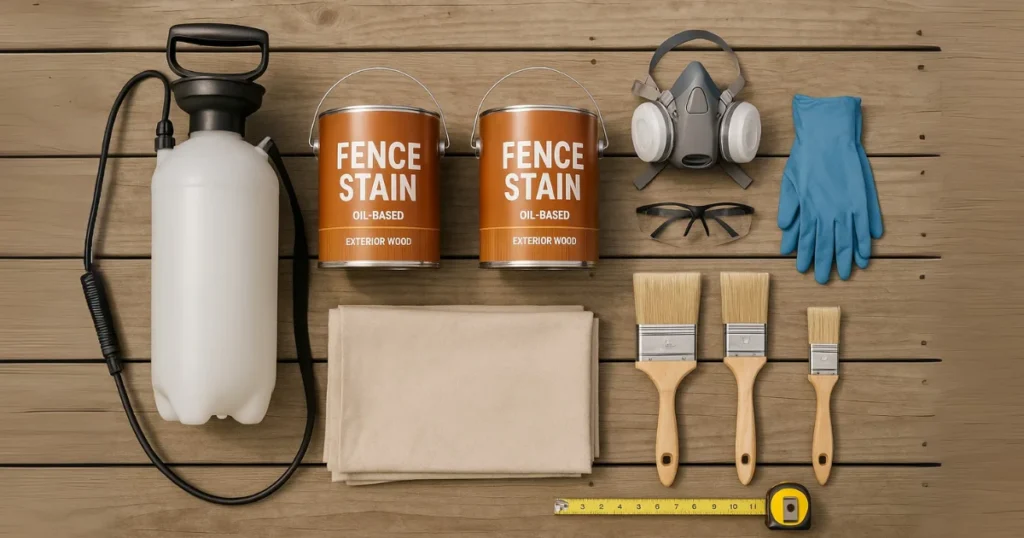
- Small DIY Projects (50–200 ft fences): Use a Scotts pump-up sprayer (around $30 at Home Depot or Lowe’s). It comes with a good fan tip, making it efficient for small jobs. The downside? You’ll need to refill it often (2-gallon capacity).
- Larger DIY Fence Staining Projects: Invest in an entry-level sprayer like Graco or Titan (around $150–$300). They usually come with a 211 tip, but upgrading to a 519 or 619 tip will speed up coverage dramatically.
If budget is tight, stick with a pump-up sprayer, it’s slower but effective.
For larger projects or if you prefer professional application, consider our professional fence staining services that include all equipment and expertise.
Calculating How Much Stain You Need for DIY Projects
Don’t guess. Use the Ninja Fence Staining Calculator to estimate gallons required based on your fence length and height.
- A standard 6 ft fence usually covers about 125 sq. ft per gallon (oil-based).
- A 100 ft fence will need around 5 gallons.
Measure using Google Maps’ “Measure Distance” tool or a simple tape measure to get accurate dimensions
Preparing Your Property for DIY Fence Staining
Overspray and drips can cause costly damage. Before staining:
Protecting Your Property
- Landscaping – Cover shrubs and plants with cloth drop cloths (not plastic, which can overheat and burn plants).
- Concrete – Protect driveways and patios with plastic, but avoid walking on it while staining. Alternatively, water down concrete continuously to prevent stains from setting.
- Neighbor’s Property – Overspray can travel 3–5 ft through fence gaps. Use a 6×8 cloth draped over the fence on the neighbor’s side to prevent unwanted mess.
- Air Conditioners – Turn units off, then cover them with cloth drop cloths to protect from overspray. Never leave them running while covered.
- Fence-to-House Attachments – Stop spraying 2 ft before the house and switch to a brush. Protect siding and brick with painter shields, cardboard, or painter’s tape.
DIY Fence Staining Application Tips
- Apply with a fan tip for even coverage.
- Rule of thumb: 100 ft of 6 ft fence = 5 gallons of stain.
- For oil-based stains, one coat is usually enough. Water-based stains may require 2–3 coats.
- Work systematically and back-brush drips for a smooth finish.
Cleanup & Protection for DIY Fence Staining
- Overspray Cleanup: Expert Stain & Seal is the easiest to clean, followed by Ready Seal. Use cotton cloths and a degreaser (available at Lowe’s/Home Depot) for handles, hinges, or metal parts.
- Protective Gear (PPE):
Always wear:
- Long-sleeve shirts and jeans
- Plastic gloves under work gloves
- Respirator (Amazon ~$35, 3M ~$110+)
- Safety glasses or sunglasses
- Hat and painter’s sock for full coverage
Oil-based stains are corrosive and penetrate clothing; double up on shirts if possible. If your fence requires extensive cleaning before staining, our professional fence cleaning service can handle the preparation work.
Frequently Asked Questions About DIY Fence Staining
Q: How long does a DIY fence staining project take?
A: Most homeowners complete a standard residential fence in 1-2 days, including preparation and cleanup time.
Q: What’s the best weather for DIY fence staining?
A: Avoid staining in direct sunlight, during rain, or on windy days. Early morning or late afternoon works best in Houston’s climate.
Q: How often should I stain my fence myself?
A: Oil-based stains typically last 3-5 years in Houston’s humid weather conditions.
Q: Can I stain over my existing fence stain?
A: Yes, but proper cleaning and light sanding may be required for the new stain to adhere properly.
When DIY Fence Staining Becomes Too Complex
DIY fence staining can be rewarding if you prepare properly and use the right stain and equipment. But it’s also easy to make mistakes that cost more to fix later.
Whether you’re tackling a small backyard section or a full property line, follow this guide to avoid costly errors. And if the project feels overwhelming, call a professional fence stainer like Ninja Fence Staining, experts who have completed hundreds of projects across Cypress and Houston, TX.
Need help with your DIY fence staining project?
Contact Ninja Fence Staining at 832-258-6164 for product recommendations, technique advice, or professional fence staining services in Houston and Cypress, TX.
This DIY fence staining guide is provided by Ninja Fence Staining, serving Houston, Cypress, and surrounding Texas communities with over 500 successful fence staining projects completed.

